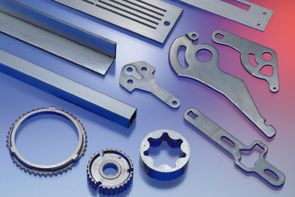
Deburring fineblanking parts | Deburring fine stamped parts
Deburring and edge-rounding machines for fineblanking parts and fine stamped parts as well as for punched or laser cut parts.
Deburring of sheet metal such as fineblanking parts or fine stamped parts usually is divided into 2 process steps.
The first step is the removal of the primary burr (that stands up over the parts surface) often followed by the second step - the rounding of the workpiece edges. The removal of the primary burr, if the workpiece geometry permits, is usually done with an abrasive sanding belt or an aggressive abrasive cup-brush or disk.
As grinding often creates a secondary burr, when a part of the material is pushed over the edges, the secondary burr also has to be removed, even if the edges shall not be rounded. That is why in the following step, the secondary burr is removed. That is done using abrasive fleece or non-woven abrasives (such as scotch-brite) brushes or other abrasive brushing tools.
By that, the originally sought workpiece geometry is created. The workpiece now is burr-free, but could still have sharp edges. If required, the edge rounding process can be performed in the same step by choosing the suitable brush-tools. (One of the reasons for edge rounding is to avoid injuries when handling parts).
Sometimes, the edge-rounding is required for technical reasons. For example, to protect electric-cables, pneumatic tubes or laboratory gloves. For some surface-ground parts, eg: sintered metal parts, a defined edge rounding is required. Choosing the right process and tools, tolerances of up to 0.02mm can be achieved.
This technology is used for punched parts, stamped and laser cut parts, fineblanking parts, fine stamping parts, sintered parts, milled parts, car rims. shop fittings, sealing plates, fittings, trim strips, clutch plates etc.. Building the machine in the right configuration using grinding stations and planetary stations equipped with the best suiting tools, which are selected according to the application - both steps - deburring and edge rounding - correspond exactly to the specifications you require.


